
Here's a little proof that this was in my blood since I was teeny tiny while I "helped" Dad build my Grandparent's house.

A few months ago (because I'm terrible at posting any fresh projects) he helped me make-over the stairs to my basement that cost only about $35.
First the before pictures.


They were so old!
It's like a linoleum from the 70's or 80's maybe. and the white toe kicks or whatever you call them, the risers, were stained up and just in need of a refresh.
What was I going to do with them you ask? Let's take a stroll to my basement board for the inspiration Pins.


If you can sense a pattern I love dark wood! If I had my choice all my wood furniture/cabinets/floors everything would be dark wood. Most of these pins was a matter of staining the wood that was under people's carpets or linoleum or whatever. So I started scraping and peeling and after hours and hours I got this far:

Anyway, after I saw what was underneath and my lack of ability to remove all the glue I decided staining what was underneath was not an option so I started shopping. I didn't wan to use glue so peel and stick tile seemed like a good option. Whomever laid the flooring in my mud room seemed to have used peel and stick tile and it looked pretty good and seemed like something I could handle in a relatively short amount of time.
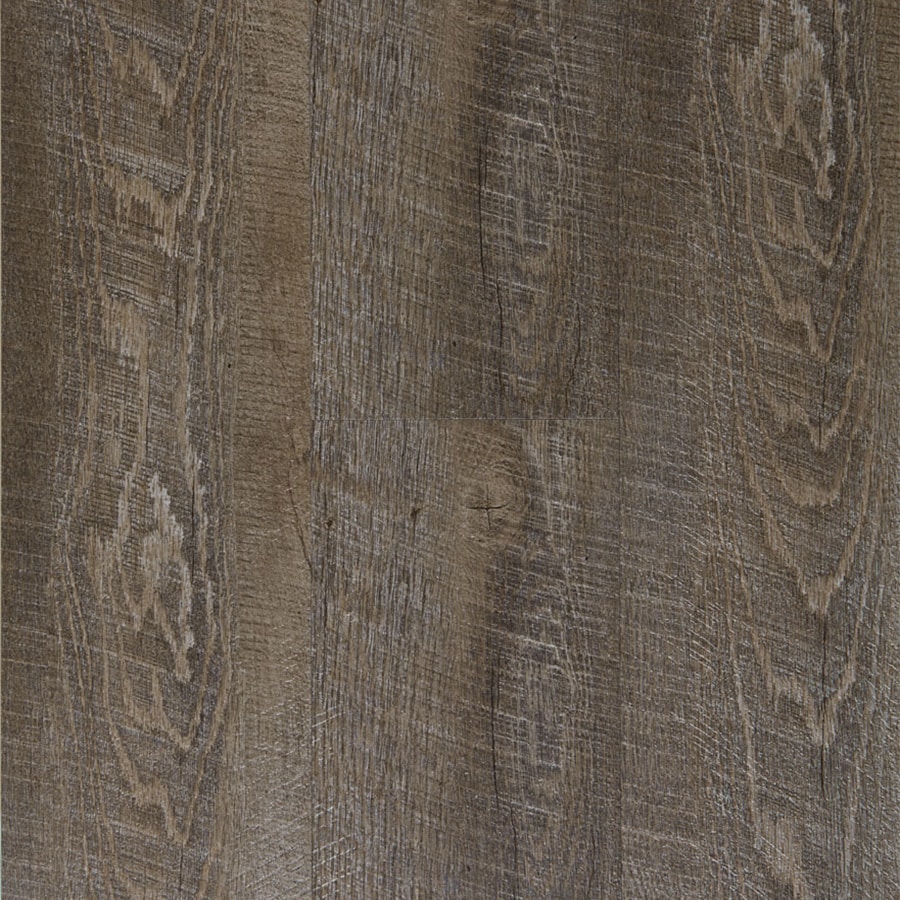
I was able to find this peel and stick wood from Lowe's for under $1 per square foot!
I did the math, and then I did it again 4 times before I placed the order. I was so scared I would get enough and I'd have to go back and risk it being out of stock. I also was worried I'd get way too much, although that'd be better because I'm always doing projects, I knew I'd put it to use sometime. As worried as I was about that, I was even more worried to lay it down and have it look stupid, or not make cuts in the right places and waste the tile. That's when I called Daddy! I need his expert measuring skills. He agreed to come so I scrubbed the linoleum that I couldn't pull up so the tile would have nothing to stick to but the stair itself and gave the toe kicks a fresh coat of white paint.
My Dad came and we got to work. I'd resume my old jobs of handing him more tile when he was done measuring, taking the trash and scrap pieces out of the work area, and making sure he had enough water and keeping the animals out of his way (ok that was a new job, we never were allowed pets growing up, probably why I have so many now lol).
Once he had the tiles in place, I'd follow behind and screw the stair tread caps back on. It only took about 3 hours and we were done!


What do you think? Do you think you might try some peel and stick tile projects? Remember they don't have to just go on your floor. Open your mind, stick them on the wall, or on a canvas, or in the back of a bookshelf. The possibilities are endless.
No comments:
Post a Comment